
Supplies Index with content on how to find and use the tools and products in the instructions:
| Setting up a workspace for a full sized dollhouse takes some thought and preparation. You need a flat worksurface with good lighting, but just as importantly, you need a space that provides either the quiet or the comraderie you hope for while the build is under way. It may be grand central station in your home, or it may be a couple of tables in the garage. Either way, you should plan for many days of lots of space. When that is not possible (the builder's constant woe) it is important to provide for ways to manage the paint and supplies, the tools and partially built pieces, all the work in progress. | |||||
 |
Here is a large flat table which is plastic surfaced (not a family heirloom!). I have two cardboard boxes I got from the office supplies store - they are big enough for all the medium-sized pieces in the dollhouse so, in between building sessions, nothing will get lost. This kind of box has a lid that is perfect for a painting tray, lined with waxed paper it can transport rail or window parts to the couch in front of the TV for social time and productivity (the best of both worlds!) | ||||
| The snap-lid bin is big enough for all of my supplies. When I keep my stuff in the bin, it is still there when I have "a few minutes" to get the next thing done |  |
||||
Supplies Index with content on how to find and use the tools and products in the instructions: |
|||||
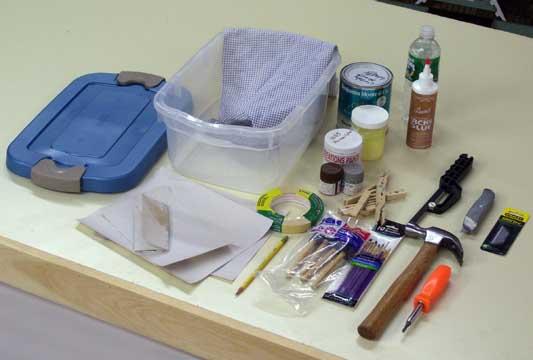
| Supplies in my Builder's Bin (in order of use and importance) | ||
| *Tape Measure and pencil / sticky notes | Paint (semigloss interior latex paint) | |
| Tacky Glue, Solvent Cement (for shingles) | Sandpaper (320 grit - 5 sheets) | |
| Masking tape ('high tack') | Brushes (package of assorted 1" and 2" foam brushes) 4" foam roller for interior priming/painting |
|
| Utility knife and package of new blades, or Double Cut Coarse file 10 or 12 inch |
||
| Brushes (package of assorted artist's brushes) | ||
'Razor' saw or fine-toothed hack saw |
Several rags and paper towels |
|
| Screwdriver (if your kit has hinges) | Bottle of water to dampen rags | |
| Hammer (12 oz is my favorite) | weights (stacks of books, jugs full of sand, big cans of tomatoes) | |
| clothes pins (spring clip style) | ||
| Q: I am building the JM1065. What tools will I need? | ||
| A: I perused the instruction and wrote down some notes on tools I use in building the house; you may also need supplies for wiring and interior finishing depending on your plan:
Tape measure, pencil, and sticky notes (for parts identification and labeling) |
||