![]()
![]()
![]()
![]()
Other Great! Websites:
![]()
![]()
Blog: (Link) (Here)
Other heat sources:
Heat lamp (Link)
Oven
Microwave (careful!)
Hot Air Gun (Movie)
Hair Dryer (Slideshow)
HotAir and Clamps (Link)
Hot Air and Spatula (Link)
Iron and Spatula (Link)
Oops!
How many times have I said that! I may be the world’s foremost expert on taking things apart. I have taken damaged parts off of more dollhouses than I can count: nicked windows, gouged trimstrips, demolished railings. But even more often, it’s something that has been assembled crooked, up-side-down, or inside-out. Then, I just want a “do-over”.
Heat softens glue
My most used tool in the “taking things apart” toolbox is heat. If I can heat up the glue without over-heating the things around the glue, the piece can be removed without damage. Any of the normal glues I use (tacky glue, carpenter’s glue, quick-tack, construction adhesive, and hot-melt glue) will soften with heat. At about 150 degrees, white or carpenter’s glue gets stretchy and I can begin to feel the part move. Then I can slowly stretch it one way then the other way, slowly, slowly, back and forth like stretching silly-putty (which stretches if it’s pulled gently but breaks if it’s pulled fast) I make the glue stretch and stretch until it’s not holding anymore.
It takes time for the heat I put on the outside of the wood to get into the joint where the glue is. If I heat the outside too hot, the wood will scorch. This is especially important if the wood is painted. It can be too hot to hold on to, but it can’t be too hot to touch – for me, that dividing line is about 170 degrees. At that temperature, it takes 20 minutes or so for the heat to penetrate 3/8″ to the glue underneath. When the glue is warm, I’ll know it by the first hints of movement when I pull on it. That’s the moment when patience will save the part from being broken. That’s when I need to go away again for a few more minutes of heating before I get burly with the parts. That’s the best reason to use a heat source that doesn’t need me right there holding it. I’m always too impatient when I’ve been sitting there holding the heat-gun.
Heat sources:
- Heat gun or high-wattage hair dryer
- Heat lamp or gooseneck desk lamp
- Oven
- Microwave
- Clothes iron
I use a microwave for small parts that fit easily – a crooked railing or a bay wall that’s backwards, a microwave is perfect. A microwave heats from the inside out so there’s no waiting for the heat to penetrate… 7 seconds for a railing is probably enough and 15, 20, 25... etc seconds for a dormer or bay wall. BUT – if the glue isn’t soft at the end of the first zap, cut the time in half for the second try (and in half again if you need a third try). Remember, it heats from the inside out and the inside is already somewhat heated. It is very easy to overheat the outside and make the paint bubble. For Railings, a little softening of the glue is all it takes to let you straighten the parts. This is the easiest “do over” of all.
Ovens fit larger pieces and they are my favorite way to go if I need to heat something with a complicated shape, particularly if it’s painted. An oven that has a low setting like 160 or 170 degrees can heat the part gently enough to soften the glue and leave the paint intact (although the paint will be soft too and you have to handle the part gently to not leave fingerprint stretch marks)
Heat lamps are really great for taking off a window or a trimstrip. I keep them a few inches away from the part until I get a sense for how much heat the lamp is putting out. Heat, test (touch and feel the heat), then heat some more. I make a heating enclosure with aluminum foil to keep the heat where I want it, and I use more aluminum foil to cover things that I don’t want heated. A tensor desk lamp is small enough to heat things inside the dollhouse too. A word of caution – window panes will be damaged by heat. Always protect a window pane from heat or be prepared to replace it.
 (a cardboard plug protects the pane)
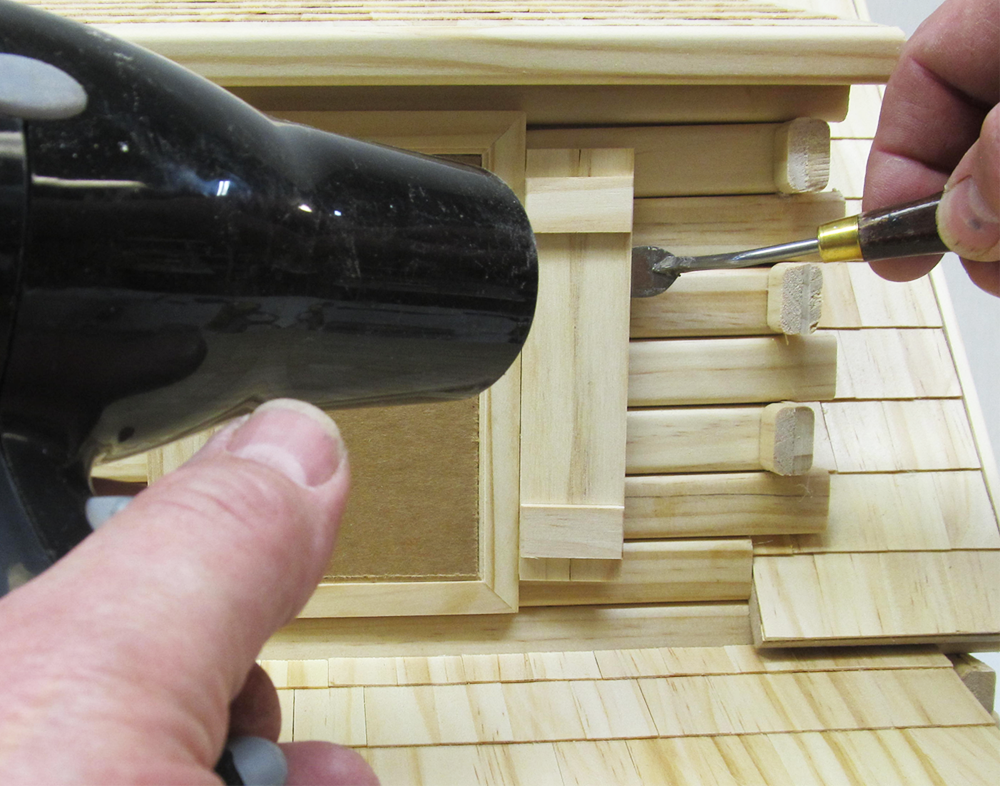
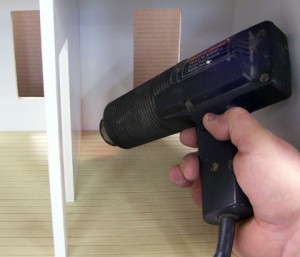
Hot air guns are the “jack of all trades” of heating-to-take-apart. Keep them 1 to 2 inches away from the wood until you get a sense for their output, and keep them moving all the time. I have used hot-air paint strippers, hair dryers, and contractor’s portable heaters to take apart everything from a foundation to taking out a floor from a fully completed dollhouse with paint, nails, and a porch. Hot air takes lots of patience, but it will get the job done and the part out, whatever it is. Use it along with a heat-lamp to spread the heating for large parts.
And now, while the part is still hot, you’re ready to scrape-off the old glue and start over.
Gary
A. Most times "messing up" the Bay means gluing the Verts on inside-out, and if that's the case, heat will soften the glue so you can take the wallset apart. Here's a slideshow of me doing a re-position of the wall parts (starts at slide 21), but the same technique works for complete dis-assembly with maybe a little more heat:
... and here's the "taking things apart" blog (you are already here) with links on the left to many implementations of heat for fixing a faux-pas:
But, if you've moved past this, then a request to info@realgoodtoys.com which includes the part names and ID numbers (quoted from the parts list) and how many you need of each will return a quote, and including your address will return shipping costs.
I encourage the "taking things apart" approach if nothing is broken yet. It's easy to do if you have patience, it saves wait-time and money, and it will bring you confidence that,
Best wishes, Gary