![]()
![]()

DHTMLGoodies.com
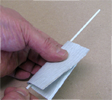
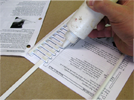
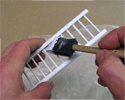
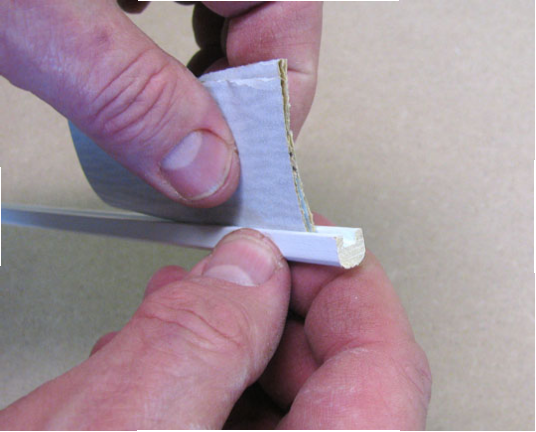
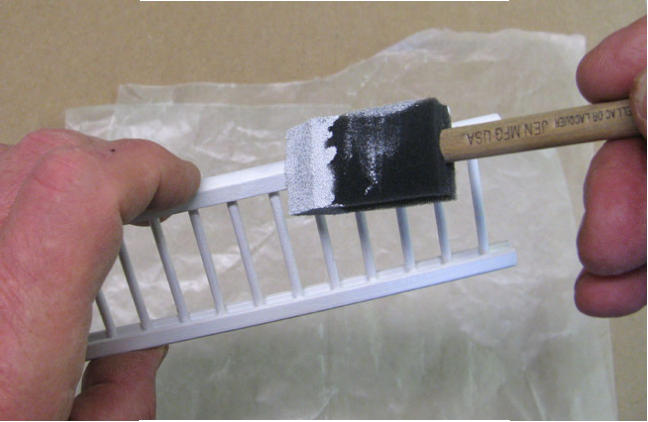
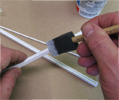 01. Paint (first-coat) the rails. I assemble the railings after one coat and sanding so the glue has some wood to grab - then paint the second coat on the assembled railing
01D.png
01. Paint (first-coat) the rails. I assemble the railings after one coat and sanding so the glue has some wood to grab - then paint the second coat on the assembled railing
01D.png
01. Paint (first-coat) the rails. I assemble the railings after one coat and sanding so the glue has some wood to grab - then paint the second coat on the assembled railing
01D.png
DHTMLGoodies.com
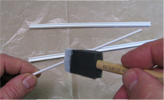
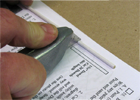
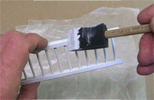
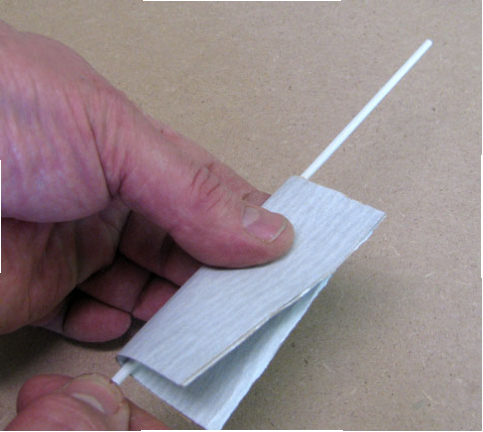
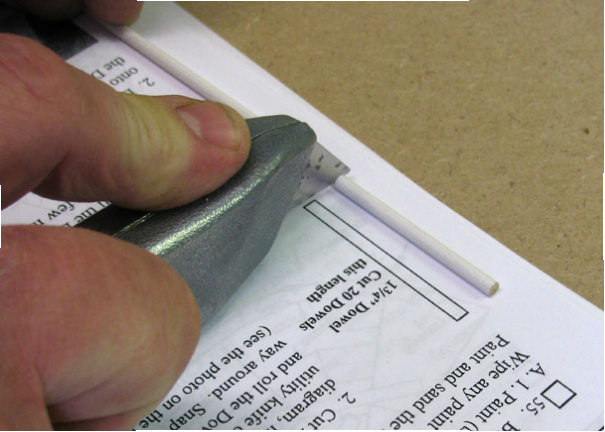
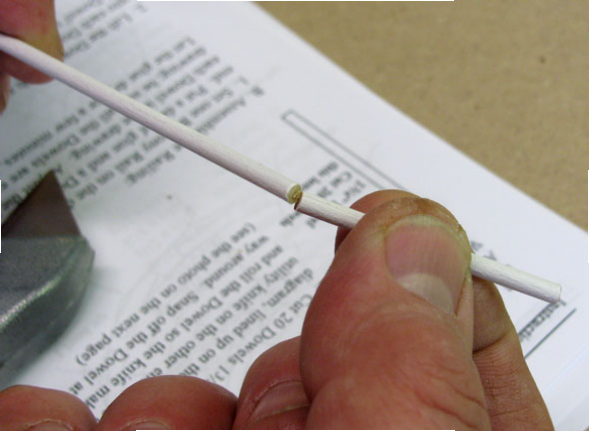
 05. Sand the dowel only pulling... back-and-forth sanding will break the dowel
05D.png
05. Sand the dowel only pulling... back-and-forth sanding will break the dowel
05D.png
05. Sand the dowel only pulling... back-and-forth sanding will break the dowel
05D.png
DHTMLGoodies.com
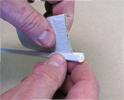
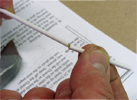
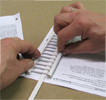
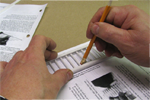
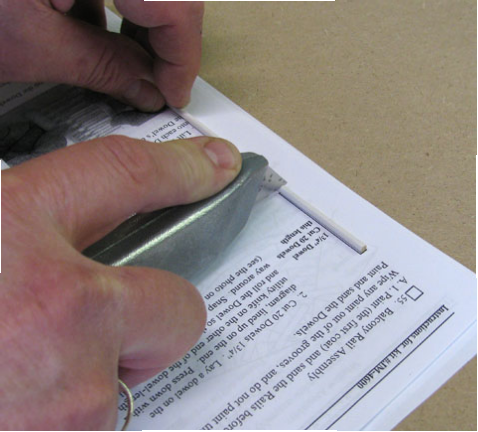
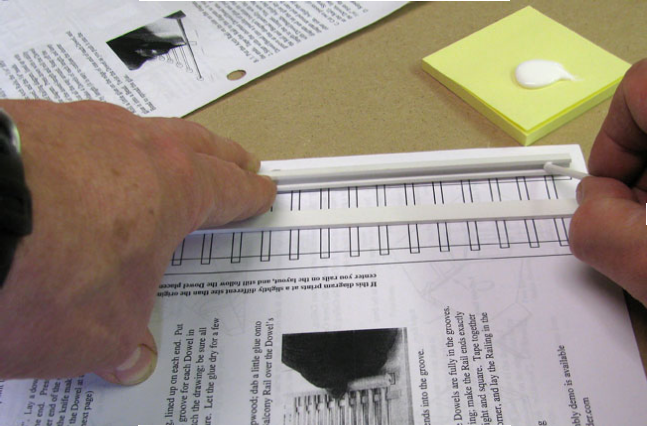
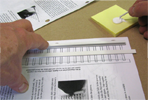 09. I'm holding the first rail on the diagram, centered (it doesn't line up perfectly, but keeping it centered makes it work anyway)
09D.png
09. I'm holding the first rail on the diagram, centered (it doesn't line up perfectly, but keeping it centered makes it work anyway)
09D.png
09. I'm holding the first rail on the diagram, centered (it doesn't line up perfectly, but keeping it centered makes it work anyway)
09D.png
DHTMLGoodies.com
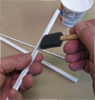
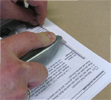
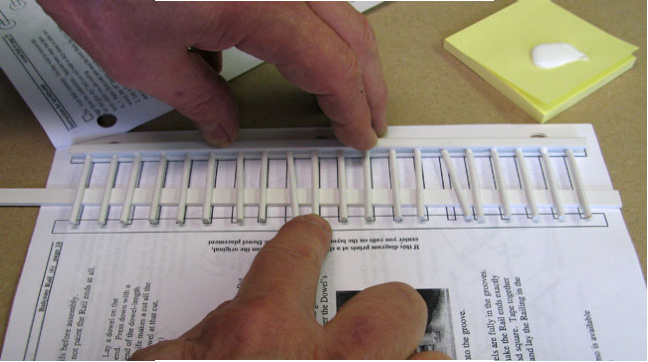
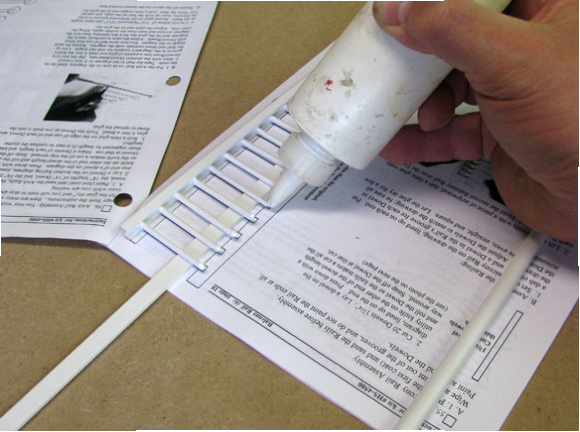
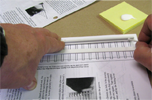 10. The glue dab on the dowel is intended to only be on the end, but a little slop will shrink away when the glue dries.
10D.png
10. The glue dab on the dowel is intended to only be on the end, but a little slop will shrink away when the glue dries.
10D.png
10. The glue dab on the dowel is intended to only be on the end, but a little slop will shrink away when the glue dries.
10D.png
DHTMLGoodies.com
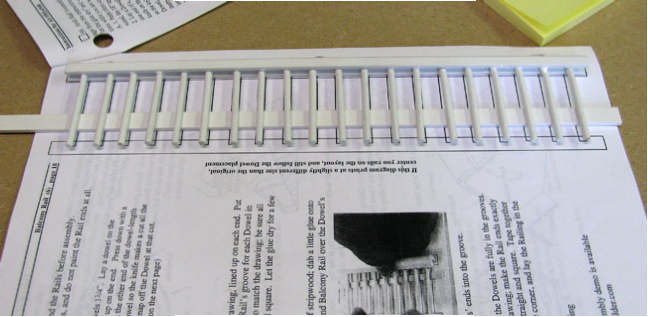
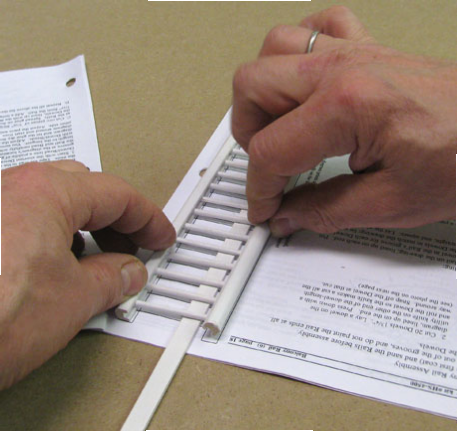
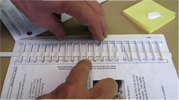 11. Once all the dowels are in, I go back and roll them into perfect position
11D.png
11. Once all the dowels are in, I go back and roll them into perfect position
11D.png
11. Once all the dowels are in, I go back and roll them into perfect position
11D.png

DHTMLGoodies.com
 14. The stripwood support is close to the dowel-ends - the #2 rail is centered on the diagram and angled down to press down and capture the dowel ends
14D.png
14. The stripwood support is close to the dowel-ends - the #2 rail is centered on the diagram and angled down to press down and capture the dowel ends
14D.png
14. The stripwood support is close to the dowel-ends - the #2 rail is centered on the diagram and angled down to press down and capture the dowel ends
14D.png
DHTMLGoodies.com
 15. Once all the dowel ends are all in the groove, the #2 rail is straightened and squeezed onto the rail set
15D.png
15. Once all the dowel ends are all in the groove, the #2 rail is straightened and squeezed onto the rail set
15D.png
15. Once all the dowel ends are all in the groove, the #2 rail is straightened and squeezed onto the rail set
15D.png
DHTMLGoodies.com
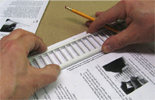
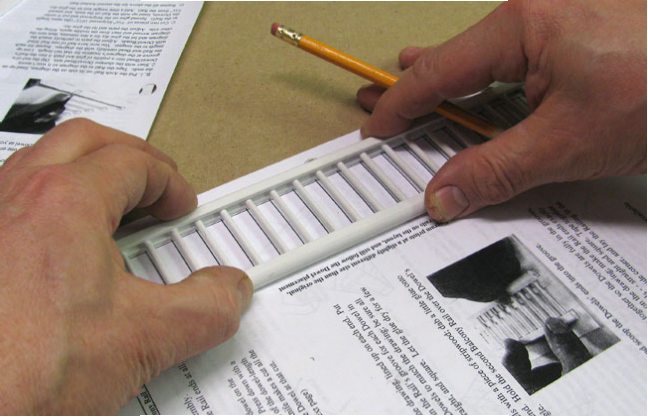
 16. Again, both rails are centered on the diagram, and the dowels are straightened with an eraser
16D.png
16. Again, both rails are centered on the diagram, and the dowels are straightened with an eraser
16D.png
16. Again, both rails are centered on the diagram, and the dowels are straightened with an eraser
16D.png
DHTMLGoodies.com
 17. A couple of dividers makes a straightening corner to hold the rails square while the glue dries
17D.png
17. A couple of dividers makes a straightening corner to hold the rails square while the glue dries
17D.png
17. A couple of dividers makes a straightening corner to hold the rails square while the glue dries
17D.png
DHTMLGoodies.com
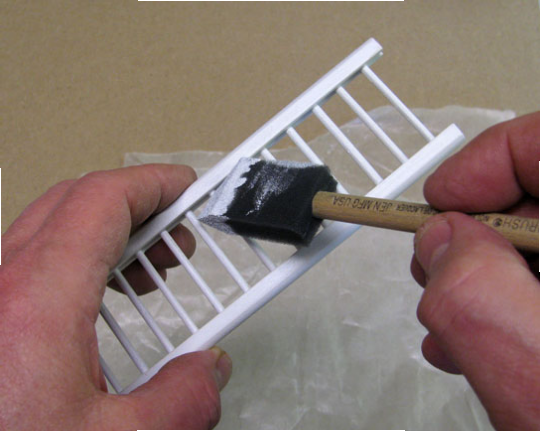
 18. Second-coat of paint, rails, dowels, grooves - everywhere except the ends
18D.png
18. Second-coat of paint, rails, dowels, grooves - everywhere except the ends
18D.png
18. Second-coat of paint, rails, dowels, grooves - everywhere except the ends
18D.png
DHTMLGoodies.com
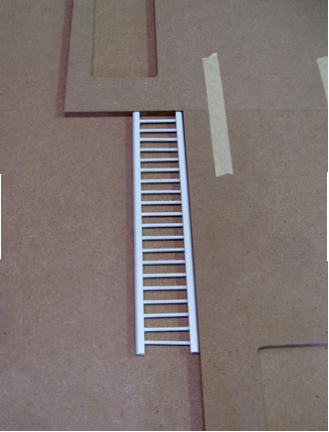
 20. Installed with spacers under the rail - if this house is going to kids for play, I glue the Railing to the Balcony Floor for extra strength
20D.png
20. Installed with spacers under the rail - if this house is going to kids for play, I glue the Railing to the Balcony Floor for extra strength
20D.png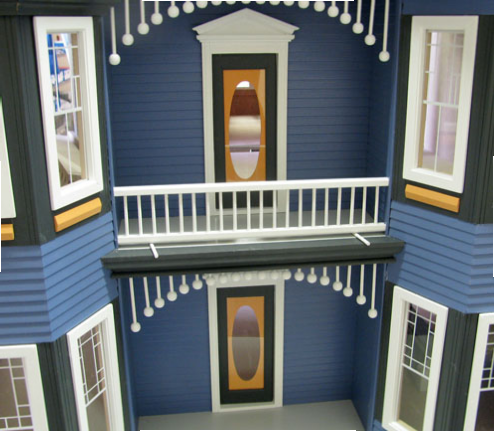